You’ve got to try these stunning blue and white winter nail designs! From delicate snowflake accents on icy bases to chic French tips with cobalt twists, there’s something for everyone. Layer holographic glitter for frosty sparkle, create ombré fades from navy to pale blue, or go bold with candy cane stripes! Add rhinestones, matte finishes, or negative-space designs for extra elegance. Each style screams seasonal sophistication without requiring professional skills. Stick around to uncover exactly how to nail each look!
Key Takeaways
- Snowflake accent nails on icy blue bases with white or pearlescent flakes create minimalist, high-contrast winter designs with crisp details.
- Frosted and chrome ice effects layer opalescent whites and silver holographic glitters over baby blue bases for light-reflective frosty finishes.
- Ombré gradients blend navy at cuticles into pale icy blue toward tips, enhanced with silver shimmer for ethereal winter aesthetics.
- French tips modernize with cobalt or baby blue on nude bases, accented with snowflake decals or silver glitter streaks.
- Negative-space designs feature crisp white snowflake outlines leaving interiors bare, paired with rhinestones or chrome lines for elegant translucence.
Snowflake Accent Nails
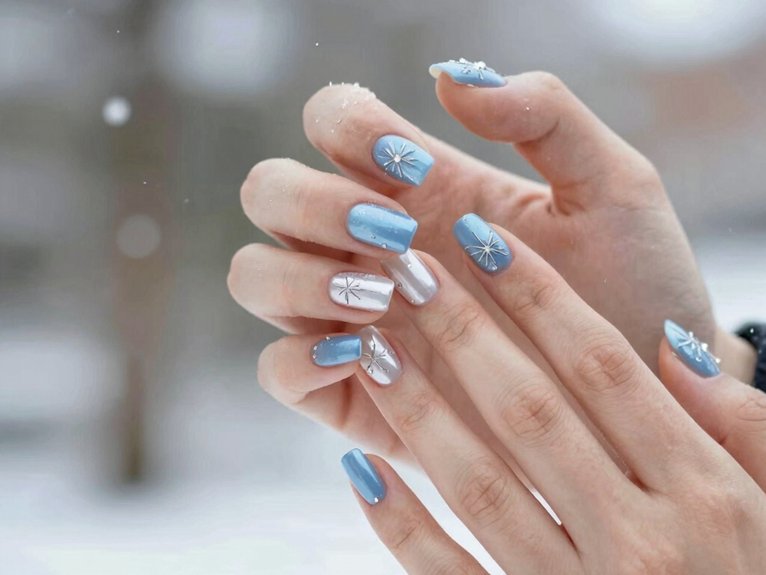
If you’re ready to bring some winter magic to your fingertips, snowflake accent nails are where it’s at!
Start with a soft baby blue or icy blue base that’ll make your design absolutely pop. Use white or pearlescent polish to paint minimalist flakes on just one or two accent nails—think ring or middle finger for that balanced, wearable look.
Want crisp details? Grab fine nail art brushes or stamping plates for precision, or go with quick snowflake decals if you’re short on time.
Here’s where it gets fun: add dimension with tiny metallic studs or silver rhinestones at your snowflake centers!
Top it all off with a glossy or matte topcoat, then keep that cuticle oil handy. Your nails’ll look absolutely stunning!
Icy Ombre Fade
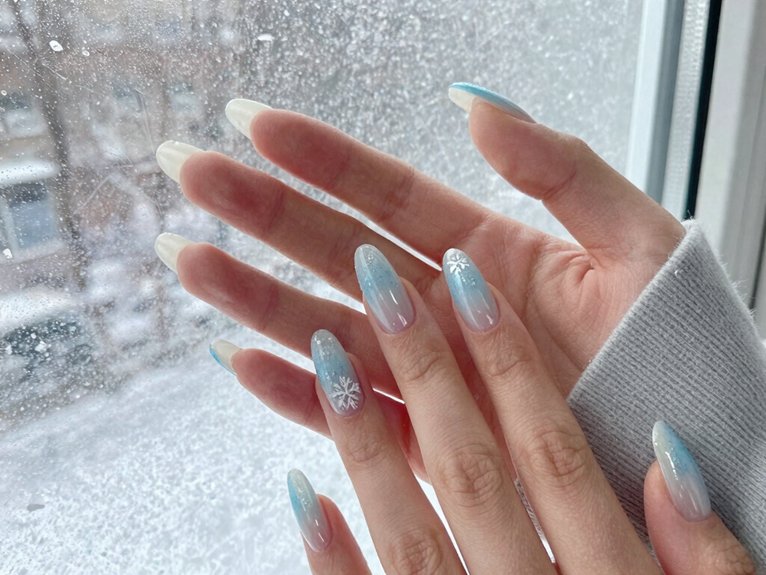
You’ll create a dreamy, soft gradient blend by layering deep navy at your cuticle and shifting it into pale icy blue toward your tips—it’s like capturing a winter sky right on your nails!
The key to nailing this look is applying thin coats and using a makeup sponge to gently dab where the colors meet, then feathering everything together with a clean brush for that seamless, professional finish.
Once you’ve got that smooth shift down, you can add a touch of silver shimmer along the gradient midpoint to really bring those winter vibes to life!
Soft gradient blend
Because winter’s all about that dreamy, frosted aesthetic, an icy ombre fade is fundamentally the ultimate nail move—and it’s easier than you’d think!
You’ll absolutely love how pastel gradients create that soft, cool-toned ombré effect that screams seasonal chic.
Here’s your game plan:
- Start with a sheer base coat to prep your nails
- Dab pale baby blue at the cuticle using a makeup sponge
- Blend snowy white toward the tip with 2–3 thin coats
- Seal everything with a glossy top coat for that polished finish
The beauty of this approach? You’re creating salon-quality results at home!
The soft gradient blends flawlessly, giving you that coveted frosty look without harsh lines.
It’s the perfect way to join the winter nail trend squad!
French Tips with Blue Twist
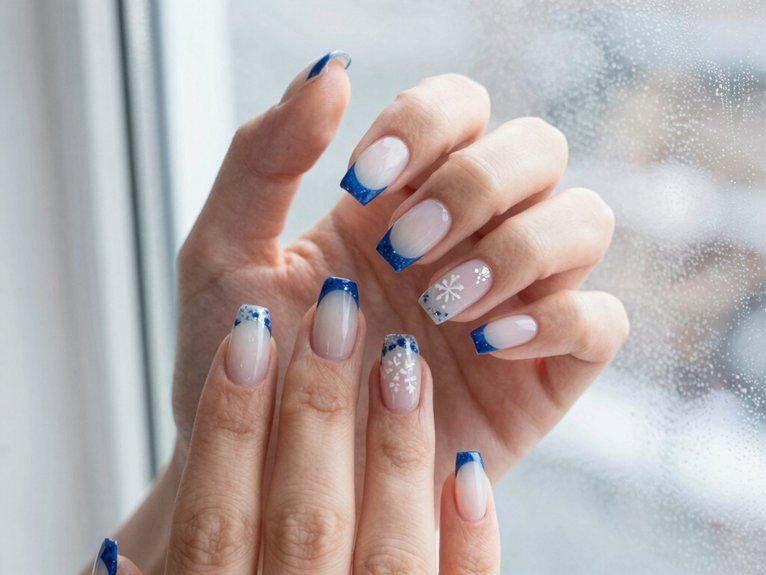
How’d you like to give the timeless French manicure a fresh, wintery makeover? You can totally swap the classic white tip for stunning blue shades that’ll make heads turn!
Try cobalt accents on a nude base for bold elegance, or go softer with baby blue for daytime charm.
Want something playful? Create negative-space designs with periwinkle gradients by painting thin lines at your nail edges or cloud-shaped tips on accent nails.
You can even mix finishes—pair matte navy tips with glossy bases for modern contrast that really pops! Add tiny snowflake decals or a silver glitter streak to one or two nails for that chic seasonal touch.
The result? A sophisticated French manicure that screams winter sophistication!
Glitter Frost Design
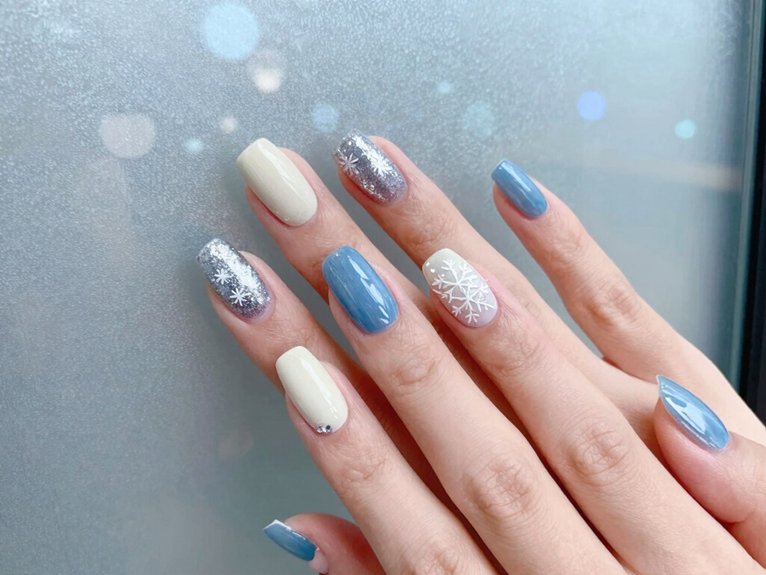
You’re going to love how a sparkle overlay finish transforms your winter nails into something absolutely magical!
By layering fine holographic or iridescent glitter over your icy-blue base, you’ll create that gorgeous frosty effect that catches light every time you move your hands.
The key is sealing everything with a glossy top coat so your nails shimmer like freshly fallen snow all week long.
Sparkle overlay finish
If you’re craving that magical, frost-kissed sparkle on your winter nails, a glitter overlay is your answer! This technique lets you create a subtle sparkle that feels both elegant and festive. Here’s how to nail it:
- Start with a sheer blue base using two thin coats for that icy shimmer foundation
- Layer a fine silver or blue micro-glitter topcoat to achieve a snow-dusted effect
- Encapsulate loose glitter between builder gel and glossy topcoat for lasting wear without chipping
- Combine micro-fine silver with larger hex glitters near your cuticle for added depth
The beauty? You’re balancing everyday wearability with holiday charm.
Apply this magical finish to just one or two accent nails while keeping others matte or glossy baby blue. You’ll achieve that coveted winter glow everyone’s talking about!
Matte Navy and White Combo
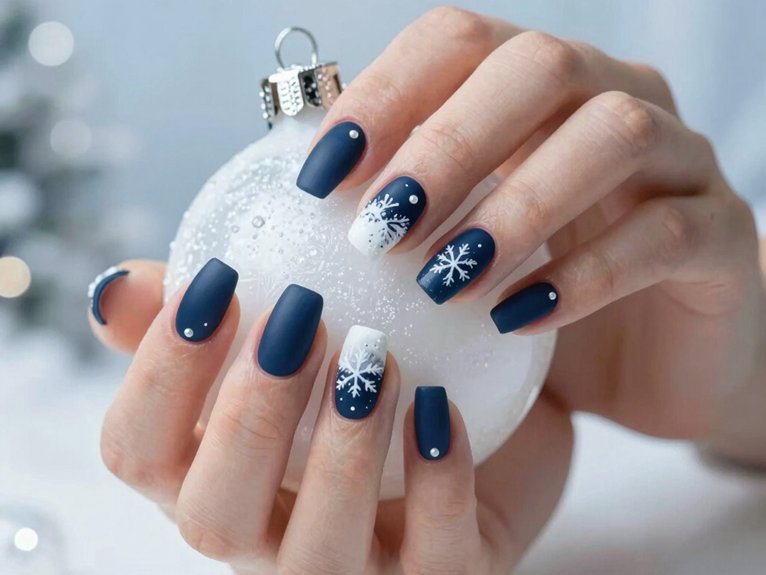
When you’re after that perfect balance between polished and easy, a matte navy and white combo absolutely delivers!
This sophisticated pairing works beautifully for both evening events and everyday wear.
Start with a deep navy base using a matte top coat to create that gorgeous navy texture, then paint crisp white geometric tips or delicate snowflake motifs on one or two accent nails.
Here’s the magic touch: add a thin metallic silver stripe between the navy and white areas for subtle shine that won’t overpower your matte gradation.
Keep your nails short to medium with square or rounded shapes to maintain those clean edges!
Seal white-painted areas with clear top coat where they meet the navy to prevent chipping.
You’ll love how effortless chic this looks!
Sweater Pattern Nail Art
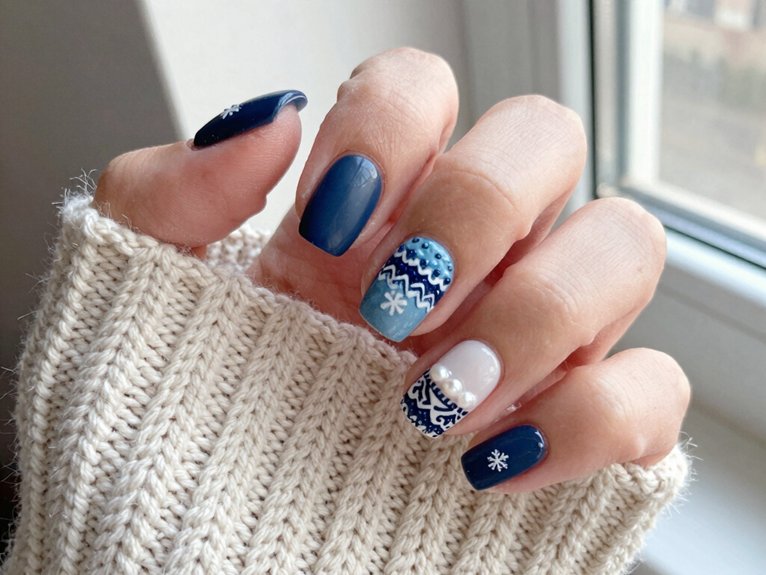
Ready to bring your favorite cozy knit vibes straight to your fingertips? Sweater pattern nail art is totally your answer!
This textured manicure recreates those chunky knit textures you love by layering raised gel designs over a light blue base. Here’s how you’ll nail this look:
- Build your cables using builder gel or thick acrylic paint for authentic raised texture
- Cure between passes under an LED lamp to guarantee durability and dimension
- Finish with matte top coat to boost that cozy cables illusion and minimize shine
- Use accent nails strategically—just one or two per hand—keeping others simple baby blue or snowy white
You can also speed things up with 3D nail stickers or silicone molds featuring sweater motifs. Navy and white contrasts really pop, giving you that classic winter knitwear feel!
Marble Blue Swirls
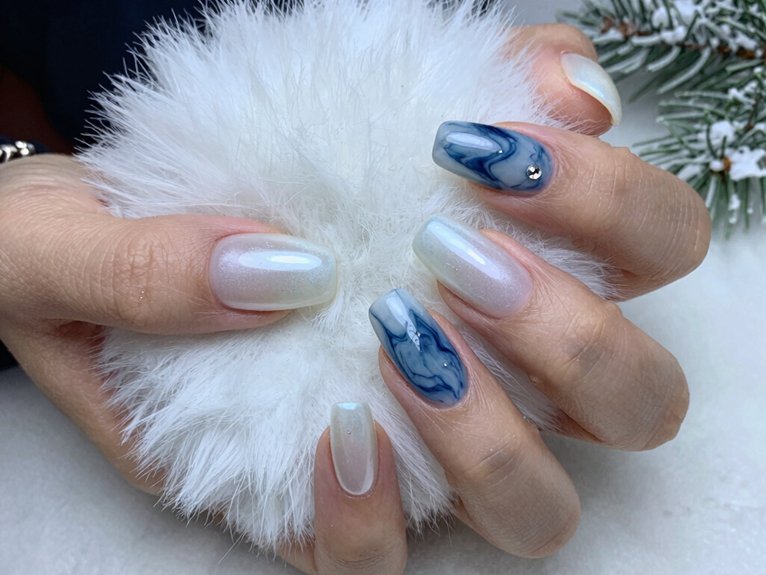
You’re going to love how marble blue swirls bring that abstract winter vibe to life—it’s like you’ve got a tiny piece of frozen stone right on your fingertips!
The swirling navy and cobalt veins dancing across your light blue base create this moody, sophisticated look that screams winter without being all matchy-matchy.
Best part? You don’t need to be an artist to pull it off; just drag a thin brush through semi-wet polish and let those beautiful, unpredictable patterns do the talking!
Abstract winter vibe
If you’re craving an icy, sophisticated look that screams winter elegance, marble blue swirls are totally your vibe! This dreamy frosty design transforms your nails into an abstract frostscape that’ll have everyone asking for your nail artist’s number.
Here’s how to nail this look:
- Start with an ice-blue base—think Pool Float or Serene Skies vibes
- Use a thin striping brush with diluted gel polish to paint soft white and navy veins
- Layer 2–3 semi-sheer coats, adding swirls between each layer for gorgeous depth
- Finish with metallic silver accents on one or two nails to catch the light
Keep things balanced by adding marble art to just 1–3 accent nails per hand, pairing them with solid navy or baby blue for contrast.
That’s the perfect recipe for wearable winter sophistication!
Chrome Ice Effect
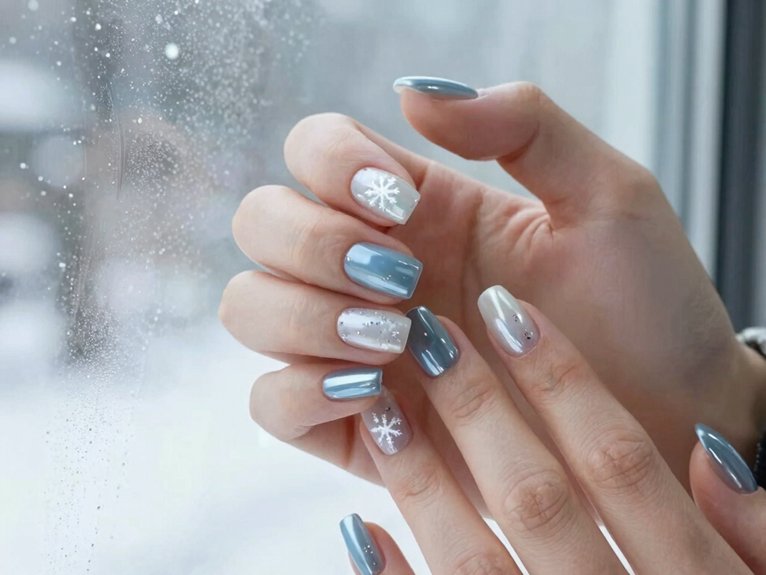
Imagine capturing the sparkle of freshly frozen ice right on your fingertips—that’s exactly what the Chrome Ice effect delivers!
You’ll start with a sheer or pastel blue base, then layer a translucent white or silver chrome powder on top to create that gorgeous icy translucence.
The result? A frosted, glassy finish that bounces light like actual ice!
For the best mirror-like shimmer, apply two coats of a light blue gel like Nail Thoughts’ Pool Float, buff on finely milled chrome powder, and seal with a no-wipe top coat.
Want something softer? Try opalescent or milky white chromes over baby blue bases for snow-dusted frosted gradients that give you that wintry glow without going full metallic.
You can even add delicate snowflake accents on accent nails for extra elegance!
Baby Blue Minimal Dots
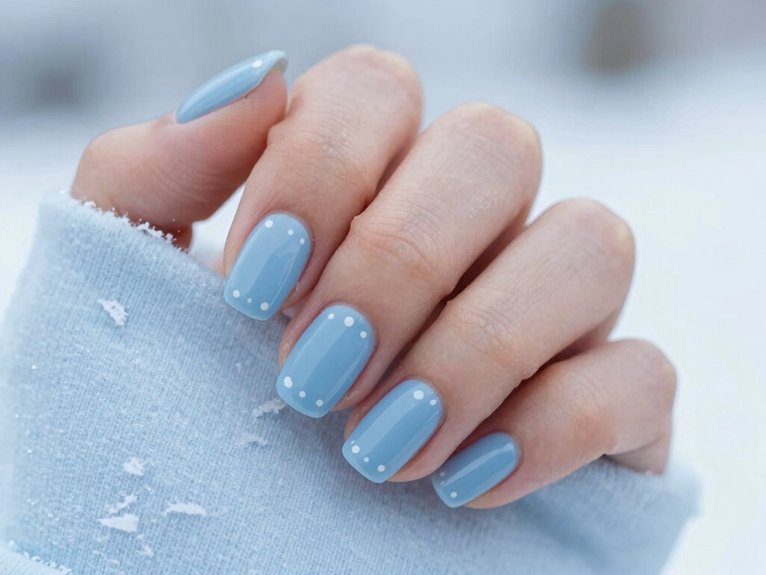
Sometimes the simplest nail designs hit different—and this baby blue minimal dots look proves it!
You’ll create a chic, understated manicure that screams sophistication without demanding attention.
Here’s your game plan:
- Apply a smooth baby blue base (think Pantone #BBDDF0) using two thin coats for flawless coverage
- Use a 1 mm dotting tool to place tiny white dots as minimalist freckles across one or two nails
- Position dots near your cuticle or diagonally to embrace pastel negative space and that airy feel
- Seal everything with a high-gloss top coat for winter durability
The beauty? You’re matching dot size to your nail length—smaller, tight dots for short nails, larger scattered ones for longer shapes.
This design lets negative space breathe, giving you that coveted minimalist energy.
You’ve got this!
Midnight Sky with Stars
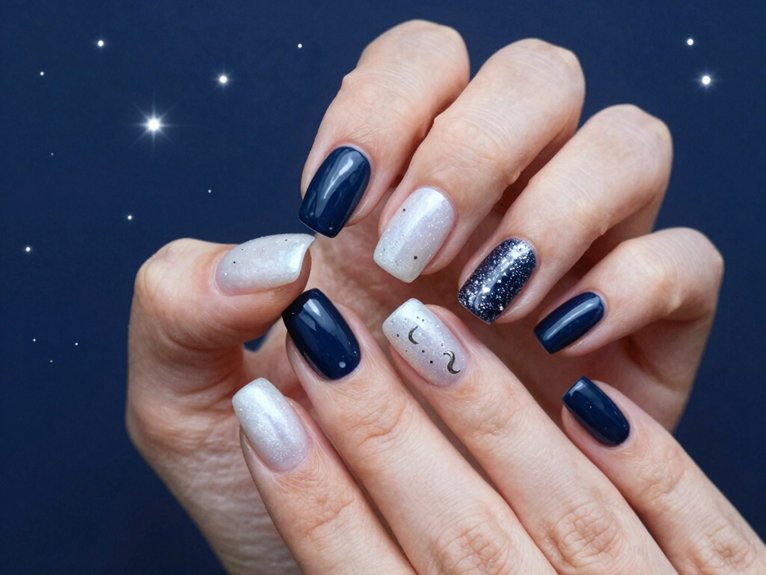
Start your midnight sky design with a deep navy base—think that gorgeous near-black blue (hex ~#0B1B3A) that’ll make you feel like you’re gazing up at the night itself! You’ll want to apply this rich, moody color as your foundation because it creates the perfect contrast for all those stellar details you’re about to add. This deep base is seriously the unsung hero of the whole look, giving your nails that mysterious, celestial vibe that screams winter sophistication!
Deep navy base
When you’re after that sophisticated, upscale-night-out vibe, a deep navy base with white star details is absolutely the way to go!
You’ll create an elegant evening look that screams winter glamour. Here’s how to nail this stunning design:
- Choose true navy polish – Use a high-gloss gel in hex #0A2342 for maximum depth and richness that makes white stars really pop!
- Perfect your constellation placement – Space three to five tiny stars across accent nails like actual constellations, keeping things classy and uncluttered.
- Add starlight shimmer – Layer subtle metallic silver flecks or a fine glitter gradient near the cuticle to mimic twinkling starlight.
- Seal with gel top coat – Lock in your midnight gradient design for 2–3+ weeks of salon-quality shine!
White Base with Blue Florals
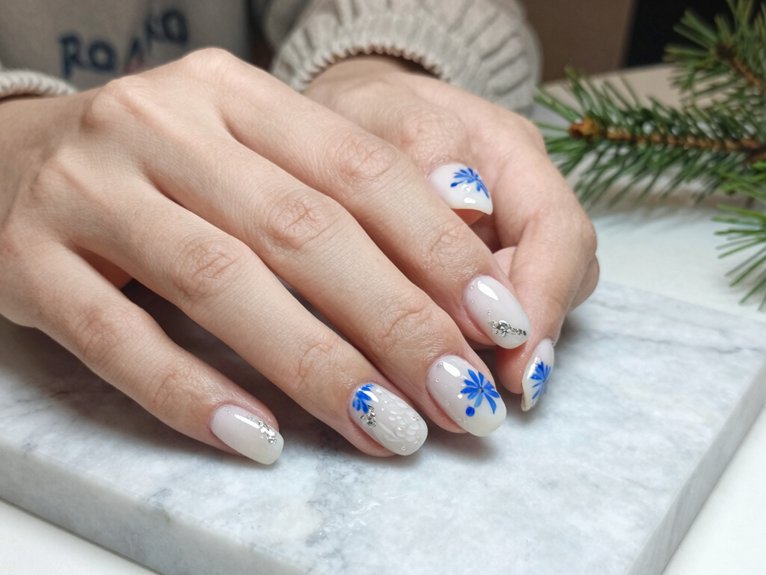
One of the easiest ways to nail a winter-chic manicure is pairing a crisp white base with delicate blue florals—and honestly, the contrast is absolutely stunning!
You’ll want to keep your micro floral designs small, about 3–4 mm across, with just 3–5 petal clusters on one or two nails.
Paint these minimalist stems and blooms on the lower third or corner for a polished, sophisticated look that screams winter elegance.
Choose your blue shade strategically: navy flatters deeper skin tones, cobalt works beautifully on medium skin, and periwinkle complements fair complexions.
Add metallic silver or fine blue glitter accents on alternate nails to echo frost and shimmer without overwhelming your design.
Finish with a glossy gel top coat for protection and longevity.
Your manicure will stay fresh and fabulous all season!
Frozen-Inspired Glitter Nails
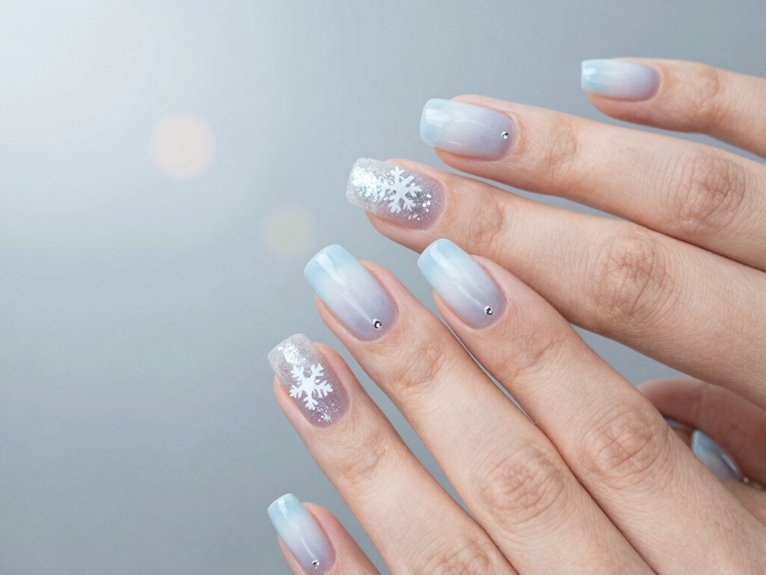
If you’re ready to amp up the sparkle and go bolder than delicate florals, frozen-inspired glitter nails are your winter answer! You’ll love how these designs evoke that magical icy vibe. Here’s how to create your perfect glacial look:
- Layer sheer icy blue with fine silver holographic glitter for a frosty, light-reflective finish that screams winter elegance
- Try a glacial ombre effect by starting glitter at your cuticle and fading it toward a baby-blue tip for subtle sophistication
- Use chunky blue-silver flakes sparingly on just one or two accent nails to mimic ice chunks without overdoing it
- Add an opalescent topcoat to create that “glass snow” effect catching light like fresh snow
You’ll seal everything with two coats of gel topcoat, keeping your icy french nails flawless through all your winter adventures!
Geometric Winter Patterns
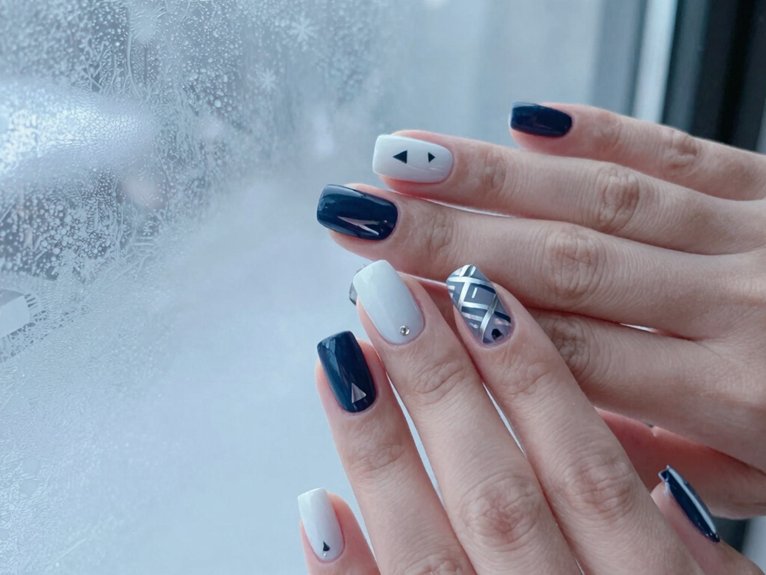
You’ll love how clean, modern lines transform your nails into a sleek winter masterpiece—think crisp white chevrons, triangles, and negative-space squares on sky-blue bases that scream contemporary elegance!
A thin striping brush or nail tape makes precision a breeze, letting you create sharp geometric designs that pop whether your nails are short or long.
The best part? You can nail this polished look without going overboard by sticking to one or two accent nails per hand, keeping things balanced and totally wearable!
Clean modern lines
When you’re craving a sleek, minimalist vibe that screams sophistication, geometric winter patterns are absolutely the way to go!
You’ll love how clean modern lines transform your nails into wearable art. Here’s what makes this look so stunning:
- Use sky-blue or baby-blue bases with crisp white lines (0.5–1 mm thick) on just two accent nails
- Create negative-space triangles and diagonal stripes off-center, letting 20–30% of your natural nail show through
- Apply metallic silver striping tape for razor-sharp edges and luxe contrast against matte white shapes
- Keep remaining nails solid deep navy or soft ice blue for balance
Your minimalist angles and airy geometry create that smoothly chic aesthetic you’re after.
Fine-detail brushes or stamping plates help you nail those consistent patterns, whether you’re doing chevrons or grids. This approach keeps things sophisticated without feeling overdone!
Blue Plaid Design
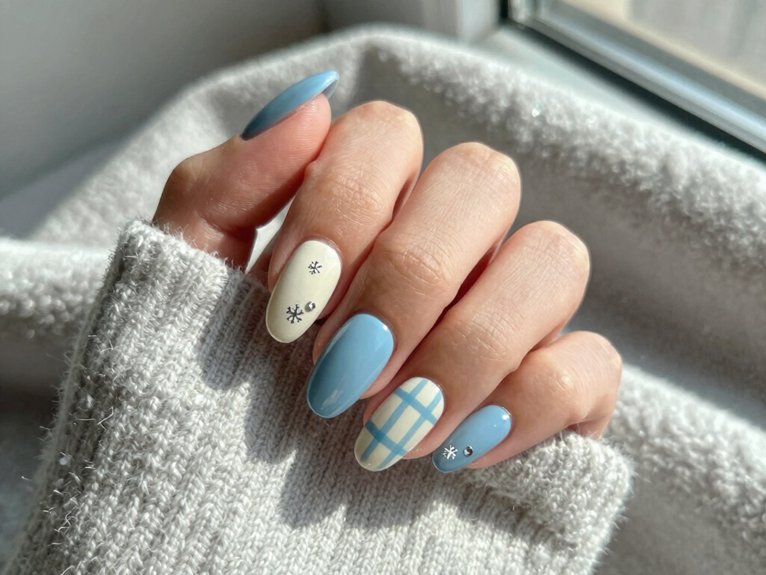
Classic plaid patterns—those crisscrossing lines that scream cozy sweaters and winter vibes—translate beautifully onto your nails!
You’ll create stunning plaid colorblocking by starting with a light blue or baby blue base, then layering navy and white lines to mimic textured tartan designs.
Here’s the secret: use a thin striping brush to apply darker blue lines first, then add delicate white highlights for dimension that’ll make your nails pop!
For balance, try featuring full plaid on just your ring and index fingers while keeping the rest solid blue or white.
A matte top coat gives you that cozy flannel vibe, while glossy finishes amp up the polish factor.
Want extra winter magic? Toss silver glitter or a tiny snowflake accent on one nail—it’s the perfect seasonal touch!
Milky White with Sapphire Tips
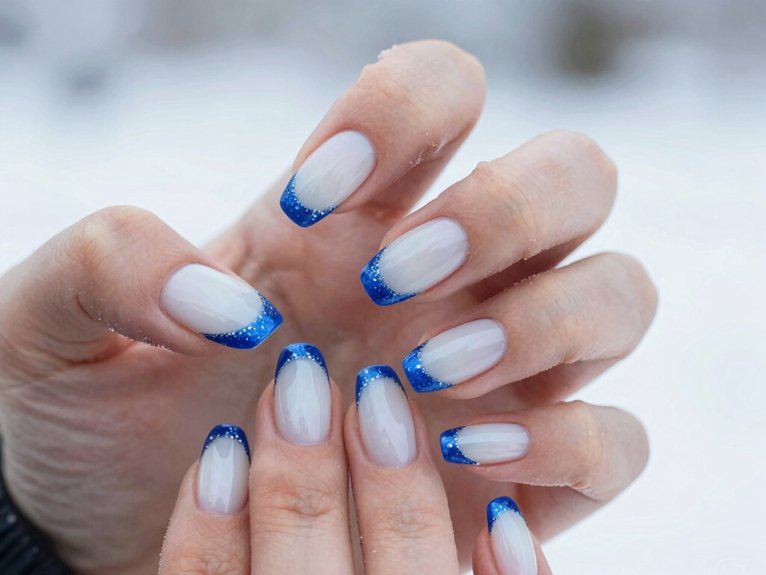
If you’re craving a manicure that screams elegance with a modern twist, this milky white and sapphire combo is your answer! You’ll create a stunning frosted French design that feels both timeless and totally on-trend.
Here’s how to nail it:
- Base coat: Apply two thin coats of diluted translucent white polish for a pearlescent sheen that’s soft, not stark
- Sapphire tips: Paint deep blue tips using OPI’s “Sapphire in the Snow” in a classic curve or diagonal line
- Silver separator: Add a crisp metallic silver line between base and tips with striping tape for icy shimmer
- Accent details: Add tiny snowflake decals or micro-silver glitter to one or two nails for seasonal flair
With proper gel top coat application and cuticle oil, you’re looking at 2–3 weeks of gorgeous wear!
You’ve got this!
Snowstorm Glitter Mix
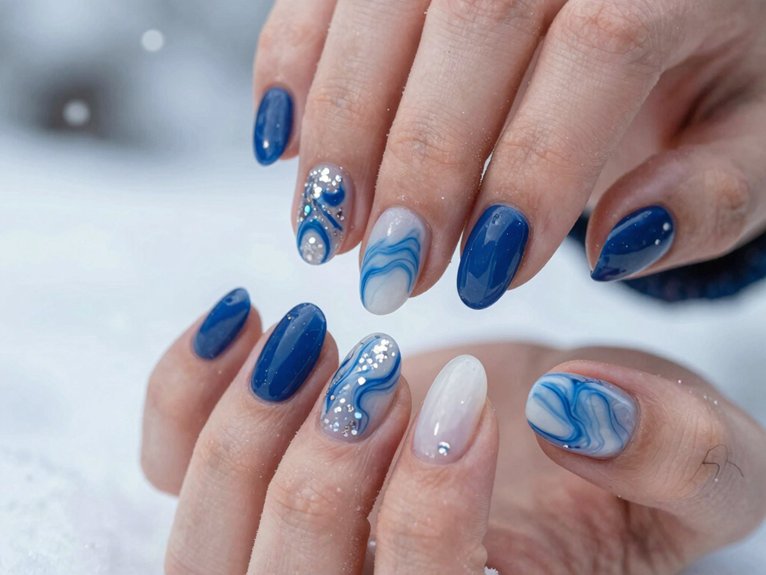
You’ll want to layer chunky sparkle detail into your Snowstorm Glitter Mix by combining silver and icy-blue hex glitters in different sizes—think fine shimmer mixed with 2–3 mm chunky pieces—to create that dense, falling-snow effect!
The trick is concentrating those bigger glitter pieces at your cuticle or tip and gradually fading them out, which gives you the visual wow factor of an actual snowstorm without looking like you just dunked your nails in a craft store.
Pair holographic microglitter with larger iridescent flakes, and you’ll get multidirectional sparkle that absolutely pops under party lights and flash photography—it’s like capturing blowing snow right on your fingertips!
Chunky sparkle detail
Transform your winter nails with the Snowstorm Glitter Mix—a stunning blend of chunky holographic hex glitters in icy blues, silvers, and pearlescent whites that’ll give you that fresh-fallen-snow vibe!
Master glitter placement and texture contrast with these techniques:
- Apply strategically using a damp brush or sponge-tap method to concentrate sparkle at your nail tips for maximum impact!
- Create gradient fades by distributing glitter sparsely toward your cuticles for subtle, blended shifts!
- Seal properly with two thick gel layers to smooth everything and keep those chunky pieces secure!
- Choose your accent nails wisely—ring and index fingers work best, or try glitter tips over dark navy bases for serious contrast!
This textured detail transforms ordinary manicures into winter masterpieces you’ll love showing off!
Negative Space Snowflakes
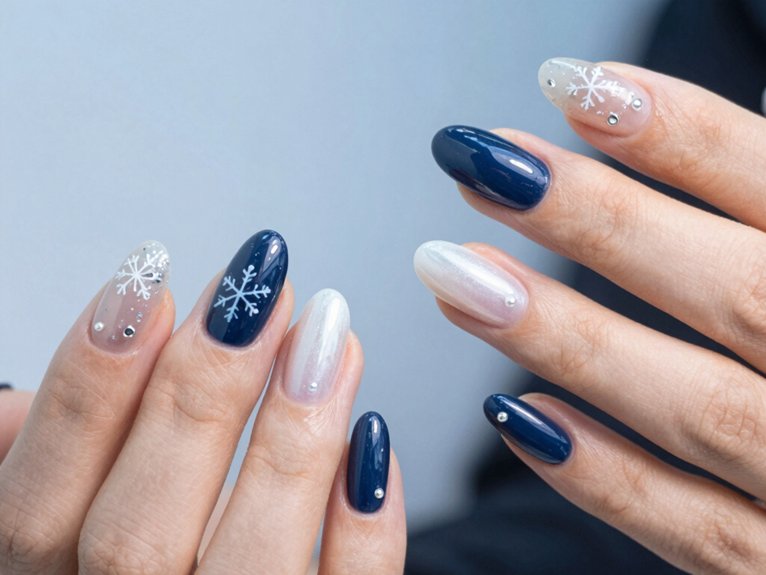
Negative-space snowflakes bring a fresh, modern twist to your winter manicure by letting your skin shine through! This minimalist negative space technique creates translucent winterflakes that feel effortlessly chic and contemporary.
You’ll paint only the snowflake outlines or partial arms in crisp white, leaving the interior bare to emphasize that gorgeous skin-through effect.
Try placing these delicate designs on just your ring and middle fingers while keeping the remaining nails solid baby blue or icy blue for maximum contrast.
Want extra sparkle? Add tiny rhinestones or thin silver chrome lines at the center points—they’ll catch the light beautifully without filling in those intentional gaps!
Seal everything with a gel top coat to guarantee your negative-space design lasts through the season.
Avoid over-layering opaque colors that’d eliminate those translucent details you’ve worked so hard to create!
Blue Aura Nails
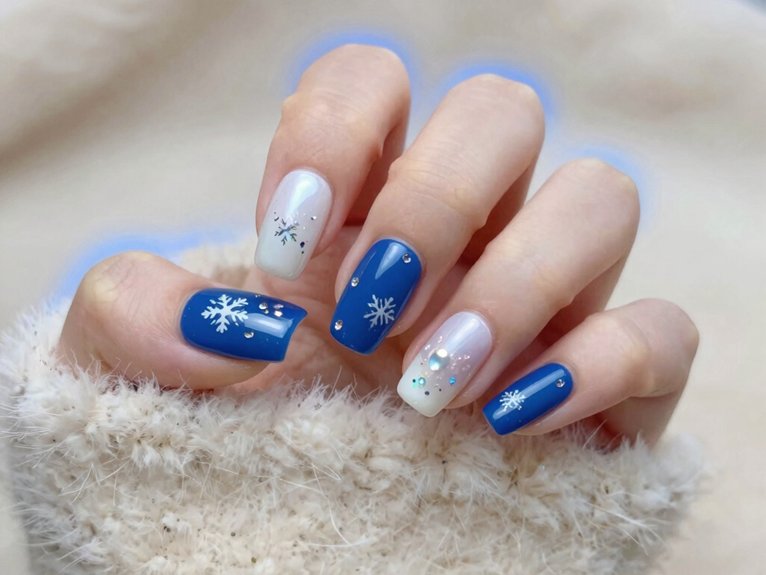
You’re about to create a totally mesmerizing soft halo effect that’ll make your nails look like they’re literally glowing!
By blending a deep navy base with pale baby blue and adding delicate silver streaks, you’ll achieve that ethereal, almost otherworldly vibe that’s perfect for winter.
The magic happens when you keep those metallic accents subtle and organic—think less “disco ball” and more “mystical aura”—so your mani stays elegant enough for any occasion!
Soft halo effect
If you’re ready to create some serious ethereal vibes, blue aura nails are calling your name! This stunning technique creates an ethereal gradient that’ll have everyone asking how you did it.
Here’s how to nail the soft halo effect:
- Paint two thin coats of navy or cobalt base for depth and longevity
- Sponge or airbrush pale blue (like Pool Float) over the center, blending edges flawlessly
- Dilute pigment with topcoat or acetone for that sheerness you’re after
- Add metallic silver or iridescent micro-glitter along the halo’s edge for frost-like sparkle
The cuticle glow is where the magic happens! Almond and oval shapes really showcase this gradient’s beauty, enhancing your nail’s natural curve.
You’ve got this—the soft halo effect is totally achievable and absolutely worth the effort!
Candy Cane Blue Variation
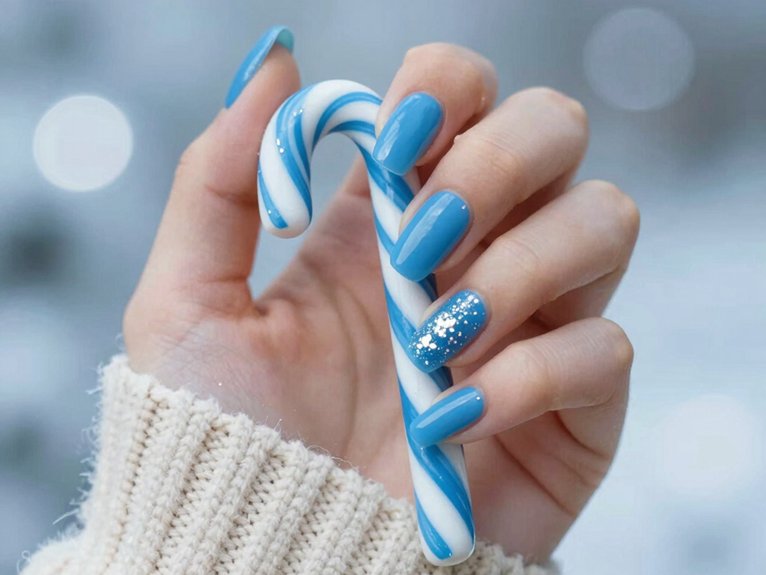
Swap out the traditional red stripes for cool cobalt or baby blue, and you’ve got yourself a candy-cane design that feels fresh and totally wintry! This twist on the classic candy cane brings cobalt minimalism to your fingertips with alternating thin blue and white diagonal stripes across accent nails. You’ll want to use striping tape or a fine liner brush for crisp, even lines—we’re talking 2–3 stripes per nail at just 1–2 mm wide against a nude or pale-blue base.
| Design Element | Best For | Application Tip |
|---|---|---|
| Thin diagonal stripes | Minimalist looks | Use striping tape |
| Bold metallic stripe | Extra dimension | Chrome topcoat finish |
| Snowflake decals | Festive touch | One accent nail |
| Silver glitter | Arctic gradient effect | Nail bed only |
| Two topcoat layers | Durability | Up to two weeks |
Seal everything with two protective coats!
Classic Navy and White Stripes
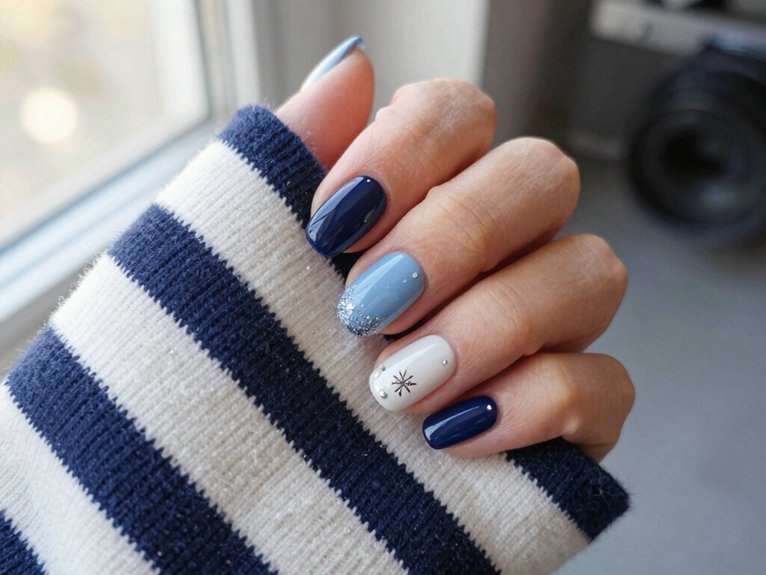
There’s something undeniably chic about a navy and white striped manicure—it’s the kind of design that looks effortlessly polished whether you’re rocking short square nails or elegant almond shapes!
This navy minimalism approach gives you polished sophistication without any fuss.
To nail this look, here’s your game plan:
- Apply two coats of gel navy for full coverage and cure between layers
- Use thin striping tape or a fine detail brush to create 1–2 mm white lines
- Experiment with stripe placement—try vertical lines, horizontal French tips, or diagonals across your nails
- Seal everything with glossy top coat to prevent chipping
Want extra sparkle for evening? Add a single metallic silver stripe on one accent nail!
You’ll fit right in with this timeless design that works year-round.
Crystal Accent Detailing
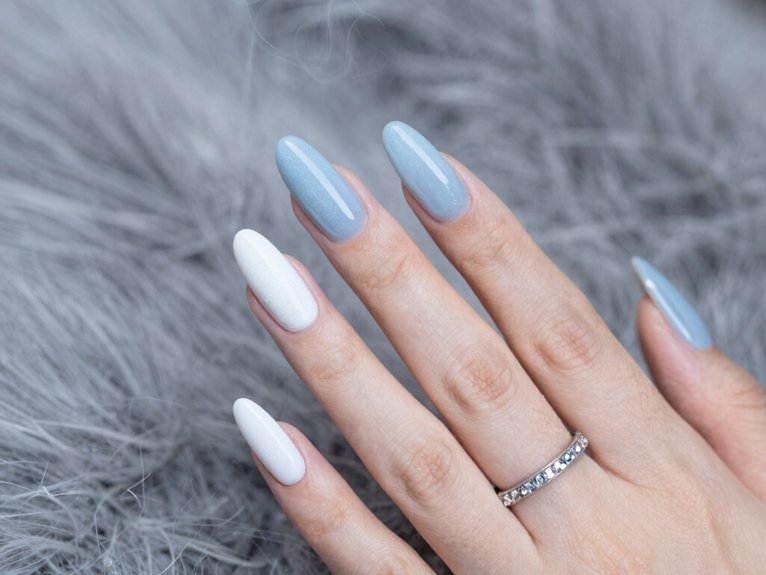
You can create a stunning rhinestone snow effect by strategically placing tiny crystal studs and graduated gems across your icy blue base—think of it like frost catching the winter sun!
Layer small 1–2 mm clear crystals near your cuticle on just two accent nails, or go bold with a diagonal cascade of stones that shrink from 2 mm down to 0.8 mm for that sleek, runway-ready vibe.
The secret’s securing everything with gel and curing for at least 60 seconds, then finishing with a careful top coat around (not over!) your sparkly stars to keep those facets gleaming!
Rhinestone snow effect
Crystal accents can totally transform your winter nails into a sparkling wonderland! You’ll love creating a rhinestone snow effect that captures that freshly fallen snow magic without going overboard.
Here’s how to nail this look:
- Mix your rhinestone sizes—combine tiny SS2–SS4 stones with larger SS8–SS10 crystals to create dimension and realistic twinkle
- Choose smart frosty placement—cluster your micro rhinestones near the cuticle or tip for authentic snow vibes
- Pair with the perfect base—use soft white or baby blue polish, then dust fine silver glitter underneath for frosty depth
- Secure everything properly—apply builder gel or strong top coat, curing for 30–60 seconds to prevent lifting in cold weather
Keep rhinestone clusters on just one or two accent nails—think your ring or middle finger—while keeping other nails solid. This balance guarantees your design stays gorgeous and lasts longer!
Frequently Asked Questions
Is Blue a Good Nail Color for Winter?
You’ll love how icy navy and frosty periwinkle seize winter’s core perfectly. These shades complement your seasonal wardrobe, flatter all skin tones, and let you blend in with fellow winter style enthusiasts while standing out elegantly.
What Is the Blue Nail Rule?
You’re creating a stunning winter aesthetic by pairing blue polish with white or silver accents—think icy ombre shifts and midnight shimmer details. You’ll boost contrast while joining the seasonal beauty community that treasures cohesive, chic manicures that feel intentional and beautifully balanced.
What Are Classy Nail Colors for Winter?
You’ll nail winter elegance with classic navy, deep sapphire, and rich jewel tones. Consider icy silver accents or velvety plum for sophistication. Matte finishes in slate blue offer modern polish. You’re creating a polished, seasonal look that’ll have everyone admiring your polished style.