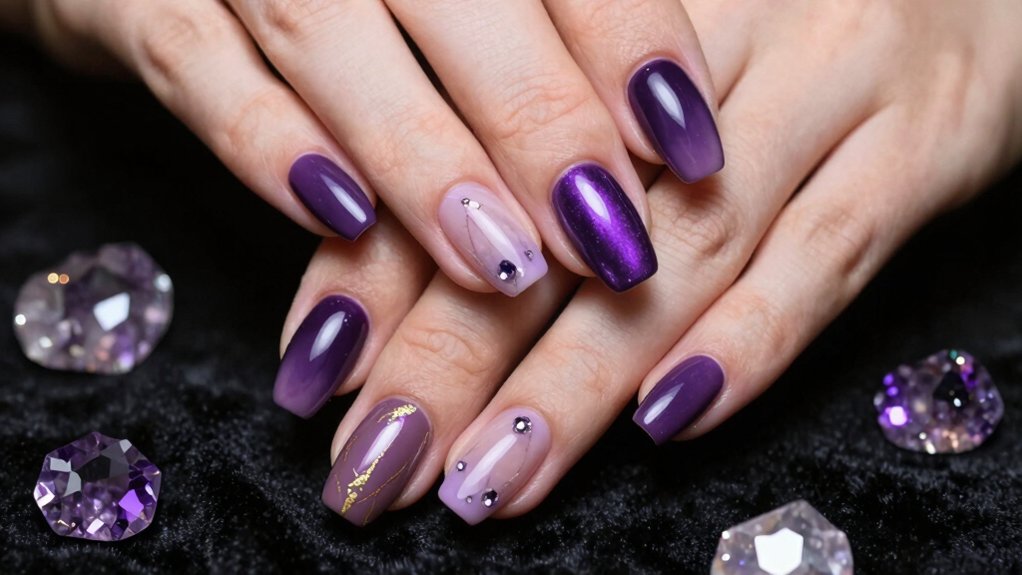
You’ve gotta try soft ombre blends this season! Layer lavender to baby pink or mint to pale yellow for dreamy gradients that’ll turn heads. Keep things chic with minimalist tips, floral accents, and matte finishes for that velvety look. Mix pastels across your nails for maximum impact, add subtle glitter to a few accent nails, or go bold with geometric patterns and animal prints. There’s seriously endless ways to rock pastels, and we’re breaking down exactly how to nail each look!
Key Takeaways
- Soft ombre blends using complementary pastels like lavender-to-pink create smooth, gradient effects with sponge or airbrush techniques.
- Minimalist pastel tips with fine striping brushes deliver an ultra-clean, elongated look perfect for short nails.
- Floral accent nails featuring hand-painted blooms on milky bases add delicate springtime charm with depth and dimension.
- Polka dots and confetti patterns using dotting tools in varied sizes create playful, forgiving pastel designs.
- Geometric and French pastel techniques with tape or stencils achieve crisp lines in mint, lilac, and buttercup shades.
Soft Ombre Blends
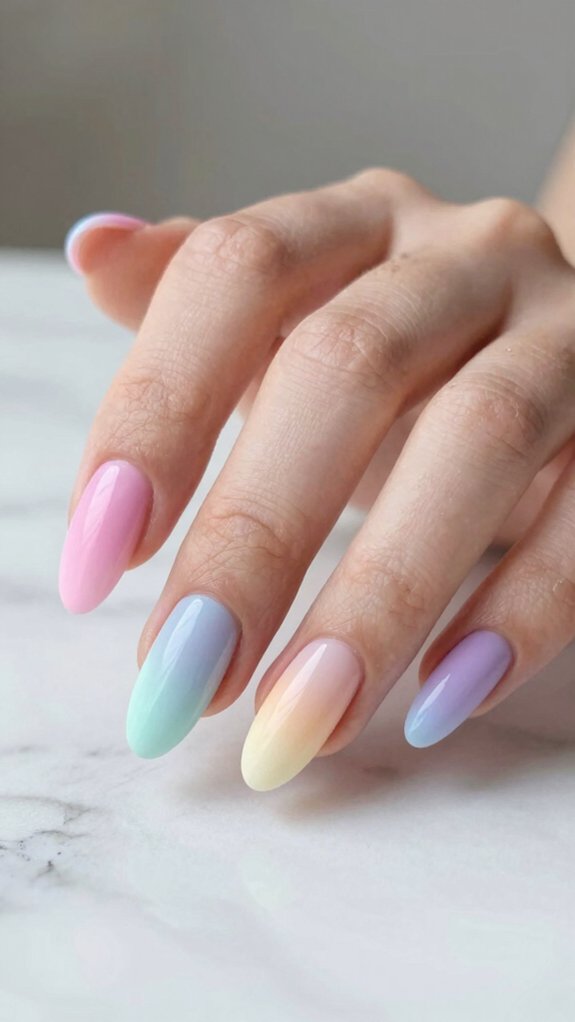
You’re going to love how easy it’s to blend two or more pastel shades together on your nails—whether you’re stamping them onto a sponge at home or requesting an airbrush treatment at the salon!
The key is picking complementary colors (like lavender melting into baby pink or mint fading to pale yellow) and layering them from dark to light, letting each coat dry before you seal everything with a glossy or matte topcoat.
With the right prep and a little patience, you’ll achieve those smooth, dreamy gradients that look like professional artwork!
Blend two or more pastel shades seamlessly
When you’re ready to level up your pastel nail game, soft ombré blends are absolutely the move—they’re easier than you’d think and look way more polished than a single solid color!
Start with two complementary shades like lilac and pink, applying the lighter pastel first as your base. Use pastel layering by sponging both colors together at the blending zone, dabbing gently until seamless.
For ultra-smooth results, try an airbrush technique to spray darker tones over milky bases—it creates that professional gradient you’re craving! Seal everything with glossy topcoat for maximum shine and staying stamina!
Minimalist Pastel Tips
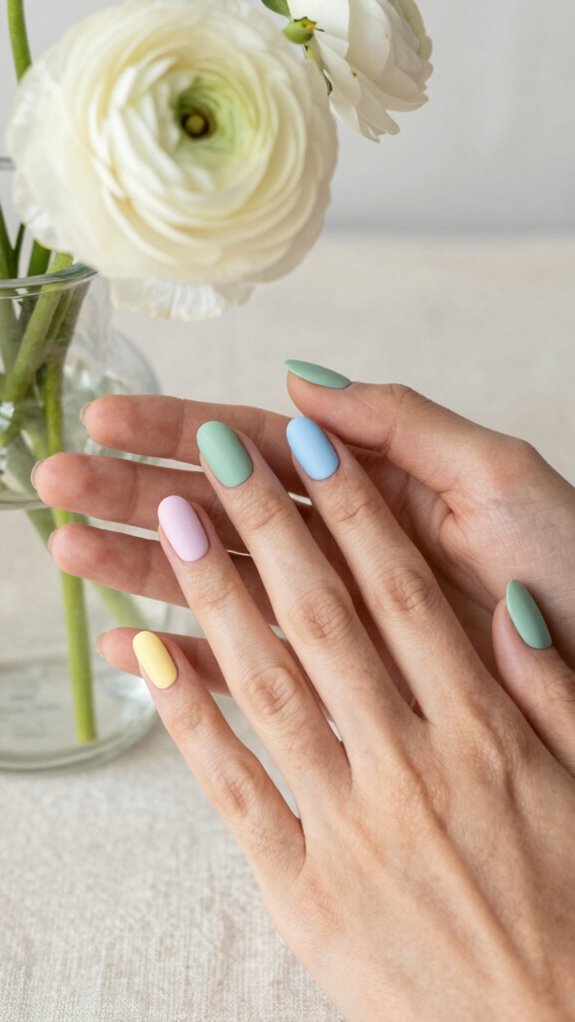
You’ll love how painting only the tips creates that ultra-clean, sophisticated look without all the fuss!
By keeping your base neutral or milky and adding those thin pastel lines just at the edges, you’re creating an instantly elongated, elegant vibe that works beautifully on short nails.
It’s the perfect balance of modern and minimal—you get personality and style without overwhelming your whole nail!
Paint only the tips for a clean look
Because less is definitely more, minimalist pastel tips give the classic French manicure a soft, modern makeover!
You’ll love how negative space creates that elongating, clean aesthetic—simply paint soft shades like baby blue or lilac on your tips while leaving the nail bed natural or milky.
Angled micro tips work beautifully on shorter nails, keeping everything delicate and polished.
Use a fine striping brush and thin layers to nail those precise edges, or grab French tip guides for foolproof application.
The result? A fresh, understated look that feels effortlessly chic and totally you!
Floral Accent Nails
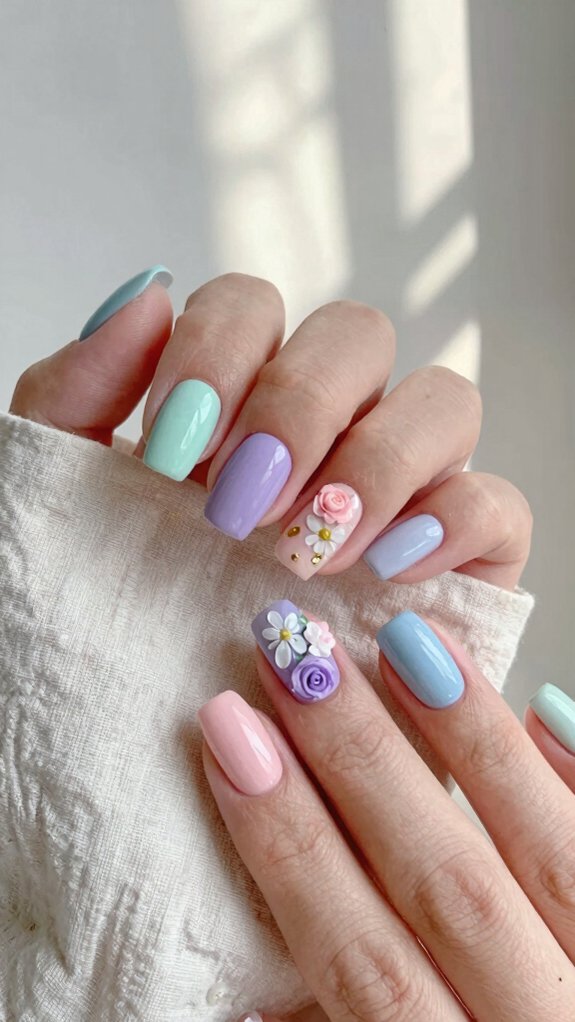
You can take your pastel nails to the next level by adding tiny hand-painted flowers that’ll make your mani look professionally done!
Whether you’re painting delicate peach-and-pink blooms on just one accent nail or creating a soft watercolor garden effect across two nails, these florals bring that perfect springtime charm without going overboard.
The best part—you don’t need elaborate skills or supplies, just a bobby pin, some pastel polishes, and a little patience to create something totally unique!
Add tiny hand-painted flowers
If you’re ready to step up your pastel nail game, hand-painted florals are where the magic happens!
Micro floral designs and tiny bouquets transform short nails into delicate masterpieces.
Use a milky nude or sheer pastel base—think lavender milk or pale peach—so your white, peach, or lilac blooms really pop!
Grab a dotting tool or bobby pin to place five small dots in circles, then drag slightly with a fine brush for dainty petals.
Add a darker center dot and tiny green stems for depth.
Limit florals to one or two accent nails per hand, keeping others solid.
Seal everything with glossy topcoat to protect your gorgeous work!
Matte Pastel Finishes
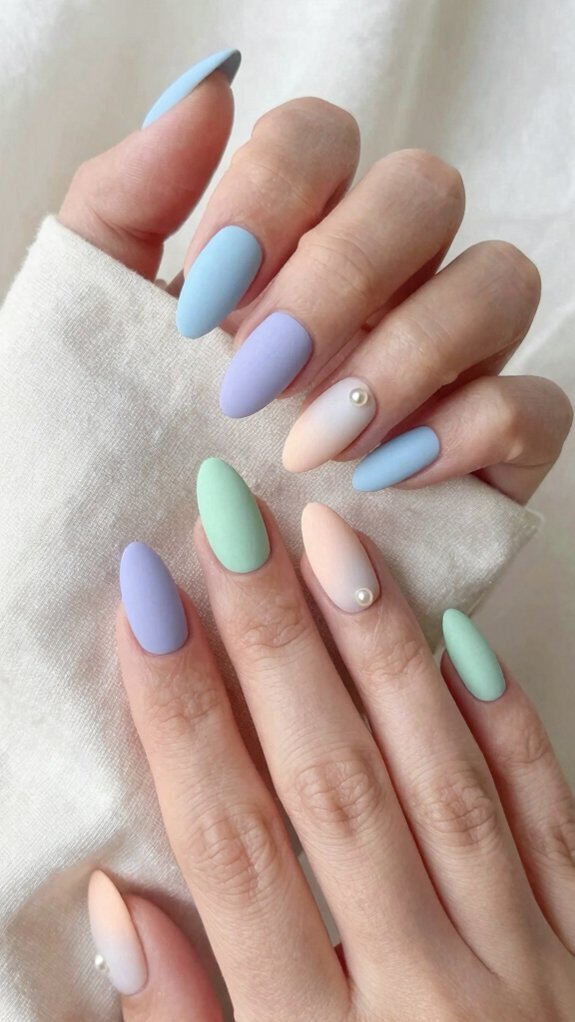
You’ll absolutely transform your glossy pastel polish into a soft, velvety masterpiece by sealing it with a matte topcoat!
This simple step doesn’t just change the shine—it actually deepens your color, making that lavender milk or buttercup yellow look way more sophisticated and modern.
The best part? You’re locking in your design and preventing any smudging, so your gorgeous matte look stays flawless for days.
Use a matte top coat for smooth finish
One of the best-kept secrets for elevating pastel nails is swapping out that glossy shine for a matte top coat! This transformative finish creates that dreamy, velvety texture we’re all craving. The key’s using proper brush technique—apply thin, even layers once your color fully cures to avoid streaky results. Your matte longevity depends on quality products and smooth application!
| Step | Action | Result | Why It Matters | Pro Tip |
|---|---|---|---|---|
| 1 | File nails evenly | Perfect base | Shows fewer flaws | Use gentle strokes |
| 2 | Buff surface smooth | Even application | Prevents texture issues | Work systematically |
| 3 | Apply thin base coat | Better adhesion | Amplifies color | Single layer only |
| 4 | Cure completely | Readiness for matte | Prevents tackiness | Check fully dry |
| 5 | Apply matte top coat | Velvety finish | Completes the look | Thin, even coats |
Geometric Pastel Patterns
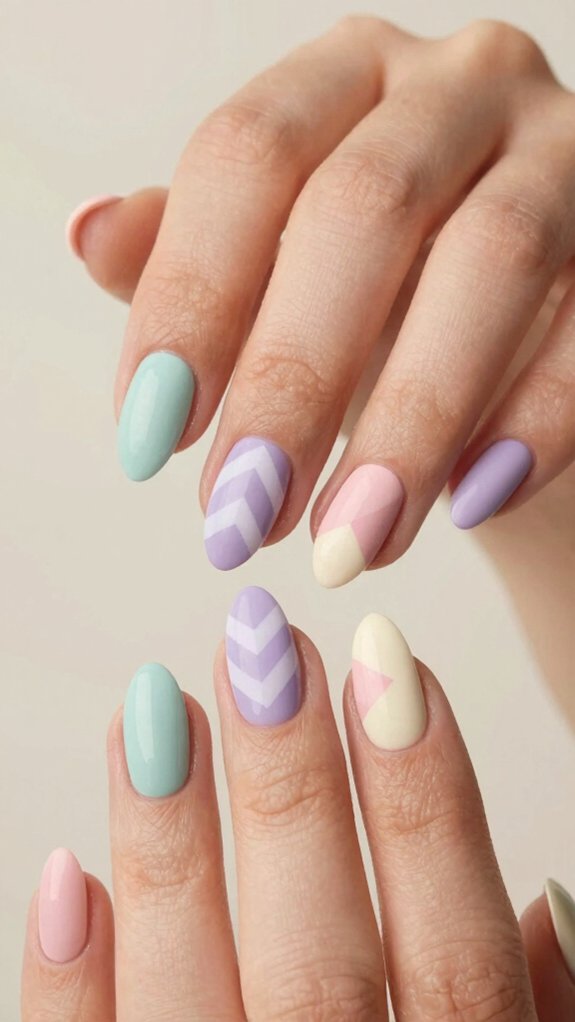
If you’re ready to level up your pastel game, you’ve got to grab some tape or stencils—they’re your secret weapons for getting those crisp, clean lines that make geometric designs pop!
Whether you’re creating sharp stripes, bold chevrons, or intricate plaid patterns, these tools take the guesswork out of precision and let you nail the look every single time.
You’ll be amazed at how much easier it’s to achieve that polished, graphic effect when you’ve got the right setup!
Use tape or stencils for sharp lines
Geometric patterns look absolutely stunning on pastel nails, but here’s the thing—getting those crisp, clean lines without tape or stencils is pretty tough!
That’s where tape placement becomes your secret weapon! Use thin striping tape or French tip guides, pressing edges firmly to prevent polish bleed.
For repeatable precision, stencil materials like vinyl molded into triangles, half-moons, or checkerboards work amazingly well with muted pastels.
Paint your base shade first, let it dry completely, then apply tape to mask sections. Remove it slowly while polish is still tacky for picture-perfect lines!
Finish with a glossy topcoat for that salon-quality shine.
Pastel French Manicure Twist
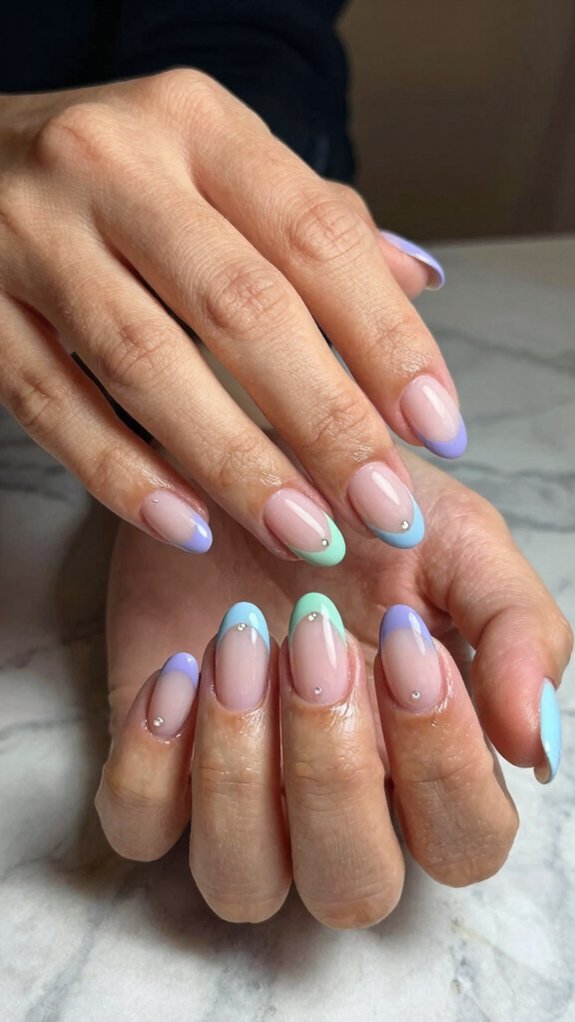
Ready to ditch the boring white tips and try something fresh? You can swap out that classic white for soft pastels like mint, lavender, baby blue, or buttercup yellow—placed in half-moons, angled tips, or even micro-tips for a subtly spring-ready vibe that’s totally your style!
Whether you’re going for a sleek reverse French or a bold two-tone combo, you’ll rock a look that feels modern, elegant, and way more exciting than the traditional version.
Swap classic white tips for pastel tones
Why stick with boring white tips when you can swap them for soft, dreamy pastels? Mint, baby blue, lilac, and buttercup create that perfect spring bridal aesthetic you’re craving!
Keep tips thinner and tapered on shorter nails to maintain beautiful proportions. Use French tip guides for crisp edges, or grab a fine brush to create naturally arched tips.
Want something extra? Try half-French or reverse French variations with contrasting white outlines for dimension! Mix pastel polish with white for translucent, milky finishes that show your natural nail.
Add muted metallics, tiny florals, or dewy drops on accent nails—you’ll totally nail that soft-glam spring vibe!
Glittery Pastel Accents
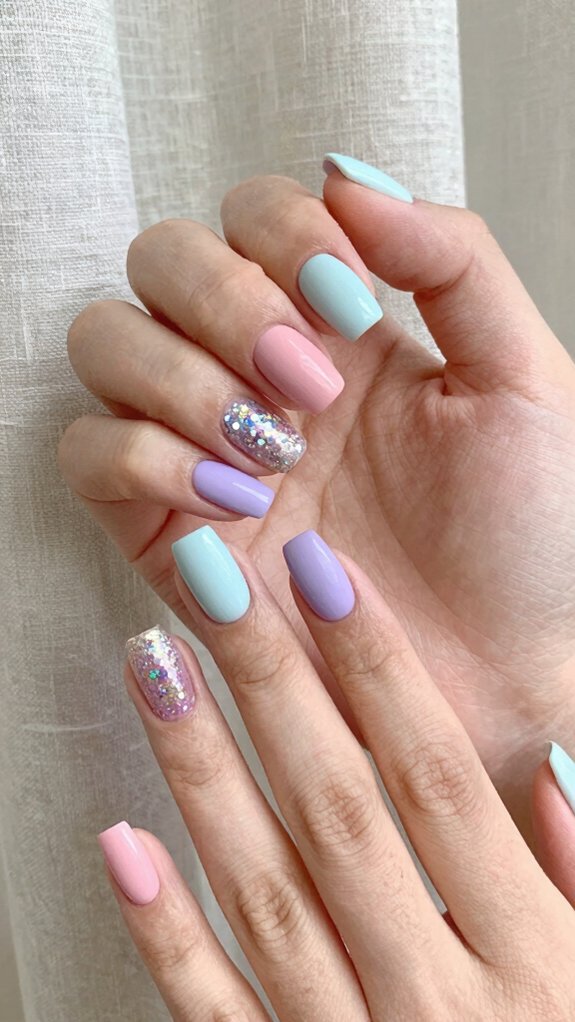
If you’re ready to add some sparkle without going full disco ball, here’s the secret: keep your glitter to just one or two accent nails and let your soft pastels do the heavy lifting!
This way, you’ll get that gorgeous shimmer effect without overwhelming your whole manicure—think of it as the perfect balance between subtle and statement-making.
You’ll love how restraint actually makes the glitter pop even more, especially when it’s paired with your milky pastel base.
Apply glitter on accent nails only
One of the smartest ways to add sparkle to your pastel nail set is by applying glitter to just one or two accent nails—think your ring finger or thumb—so you’re not drowning the whole look in shimmer. This accent placement strategy keeps your soft pastels looking elegant and fresh!
You’ll love how coordinating glitter colors with your pastel palette creates cohesive designs. Try pearlescent chrome over pale pink or iridescent flakes on lavender for seriously gorgeous results.
Plus, concentrating glitter on fewer nails makes glitter removal way easier when you’re ready for your next manicure!
Candy-Colored Stripes
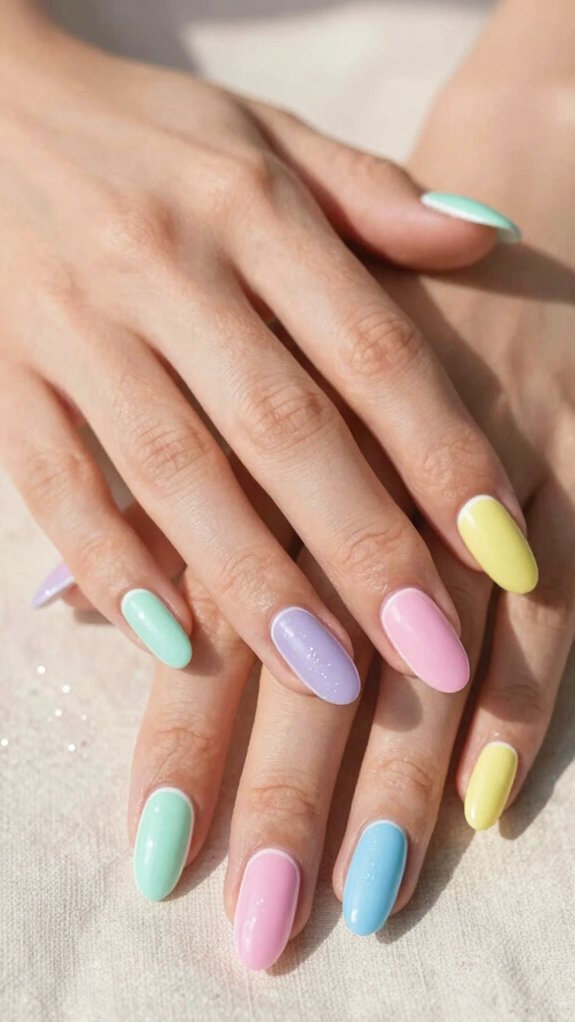
You can totally transform your nails with thin horizontal or vertical stripes in those dreamy pastel shades—mint, lavender, bubble-gum pink, butter yellow, and baby blue all work amazingly!
These graphic stripes elongate your nails and give you that modern, polished look that’s getting major buzz for 2026.
The best part, you don’t need perfect precision; mix different stripe widths and colors on each nail for a fun, playful vibe that’s uniquely yours!
Thin horizontal or vertical stripes
Since pastel palettes are having a major moment in nail art, thin horizontal or vertical stripes are the perfect way to embrace the trend without going overboard! You’ll love how these delicate lines create dimension while keeping things wearable and chic. Try combining mint, lavender, and bubblegum pink for that signature candy-colored vibe. Use striping tape or a toothpick for crisp lines, and don’t skip the white outline between colors—it’s a game-changer! Finish with glossy topcoat for shine or matte for modern softness. These stripes work beautifully on longer nails and scale down perfectly for shorter lengths too!
| Stripe Direction | Best Base Color | Color Combo |
|---|---|---|
| Vertical | Baby pink | Lavender + butter yellow |
| Horizontal | Milky white | Mint + bubblegum pink |
| Mixed | Cream | All pastels blended |
Cute Pastel Polka Dots
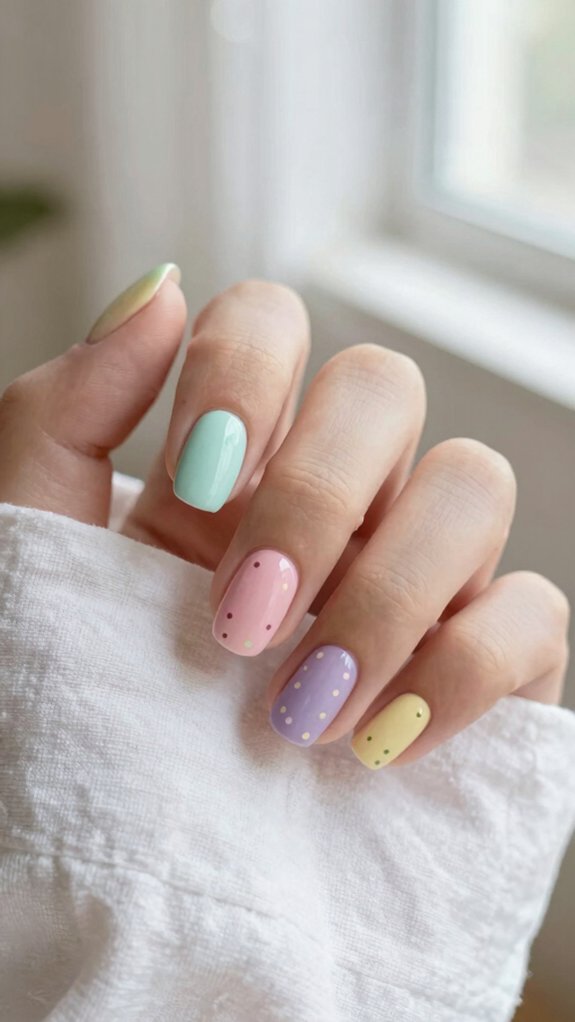
You’ll want to grab a dotting tool to nail those picture-perfect polka dots—trust me, it’s way easier than trying to freehand them with a bobby pin!
Just load your dotting tool with polish and press straight down onto your base to create uniform dots that look professionally done.
Once you’ve got your dots arranged just right, seal everything with a glossy topcoat so your pastels stay shiny and chip-free!
Use a dotting tool for uniform dots
Polka dots are *everywhere* in the nail art world, and honestly, they’re easier to nail than you’d think! Grab a two-sided dotting tool—the larger end creates bigger dots (about 2–3 mm), while the smaller end makes delicate accents (1 mm).
Here’s the secret: consistent dot placement transforms your design from random confetti to classic polish perfection! Lightly mark your grid with a toothpick on cured base polish first.
Load your tool with polish, stamp straight down, and avoid twisting—that keeps dots beautifully round. With proper tool care and technique, you’ll create uniform, gorgeous dots that’ll have everyone asking for your manicurist’s number!
Pastel Marble Effects
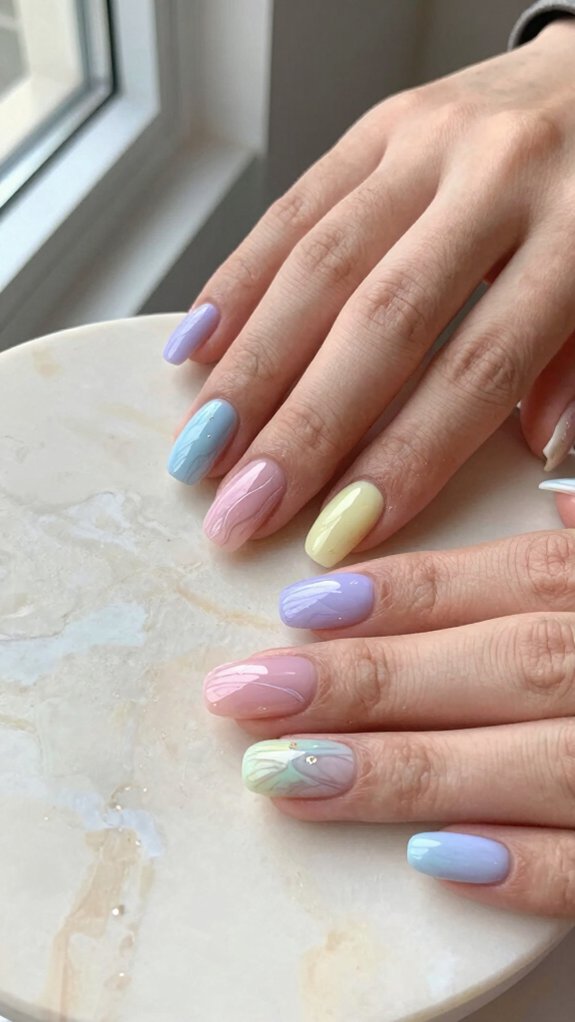
Ready to create some seriously gorgeous nail art? You can swirl two pastel shades together on your nail using a thin brush or dotting tool, letting the colors blend into soft, dreamy veins that look totally professional!
The best part is that you don’t need elaborate equipment—just drop tiny dots of your chosen pastels onto a glossy base and drag them together to get that marbleized effect that’ll have everyone asking where you got your nails done.
Swirl two pastel shades on nail
Transform your nails into works of swirled art by layering two complementary pastel shades together!
Start with a milky base coat, then drop your chosen pastels while the polish stays tacky—timing’s everything here!
Grab a thin brush or toothpick and swirl gently once to create those delicate veins without over-mixing.
Try lavender with baby blue or peach with mint for stunning combinations.
Vary your color ratios so each nail looks beautifully unique!
Seal everything with a generous glossy topcoat or domed depth for that gorgeous 3D water-like effect.
You’ve totally got this!
Gradient Pastel Nails
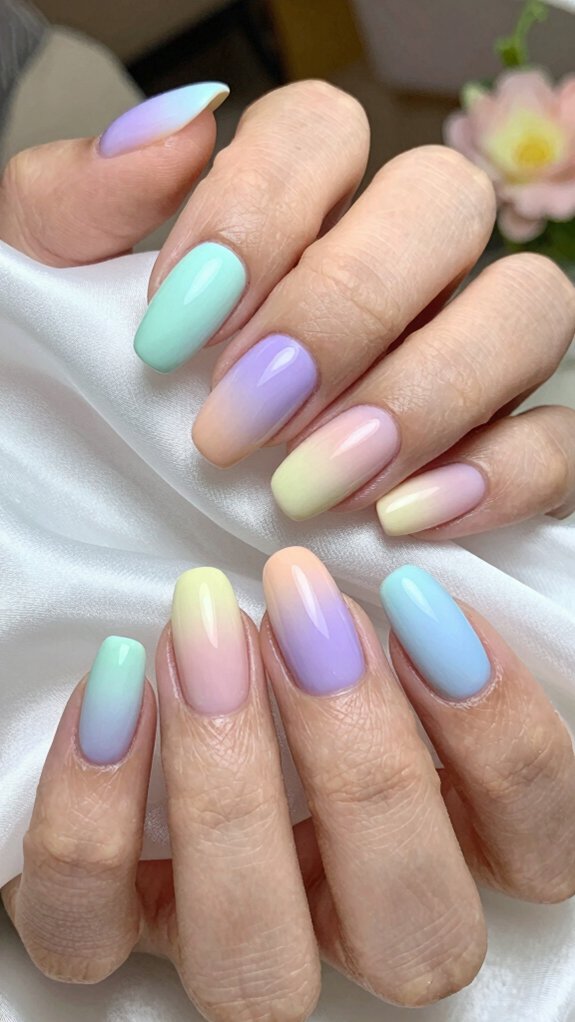
You’re going to love how easy it’s to create a stunning sponge gradient that shifts from light to dark pastel shades!
Grab a makeup sponge, dab your lighter pastel on one end and your darker shade on the other, then gently stamp it onto your nail in light, overlapping layers—letting each pass dry before you add the next to avoid those annoying streaks.
The result? A silky-smooth gradient that’ll make your nails look professionally done, even though you totally nailed it at home!
Sponge gradient from light to dark pastel
For a dreamy ombré effect that’ll make your nails look professionally airbrushed, you’ve got to try the sponge gradient technique!
Start with a prepped base coat and white or milky layer for optimal color payoff.
Here’s where the magic happens: apply your lightest pastel to the nail, then blend two to three shades on your sponge, dabbing from light to dark.
Work in thin layers, letting each dry slightly to avoid streaking.
Your color placement matters—build pigment gradually toward the tip!
Seal everything with glossy topcoat for that flawless finish and extended wear!
Pastel Animal Prints
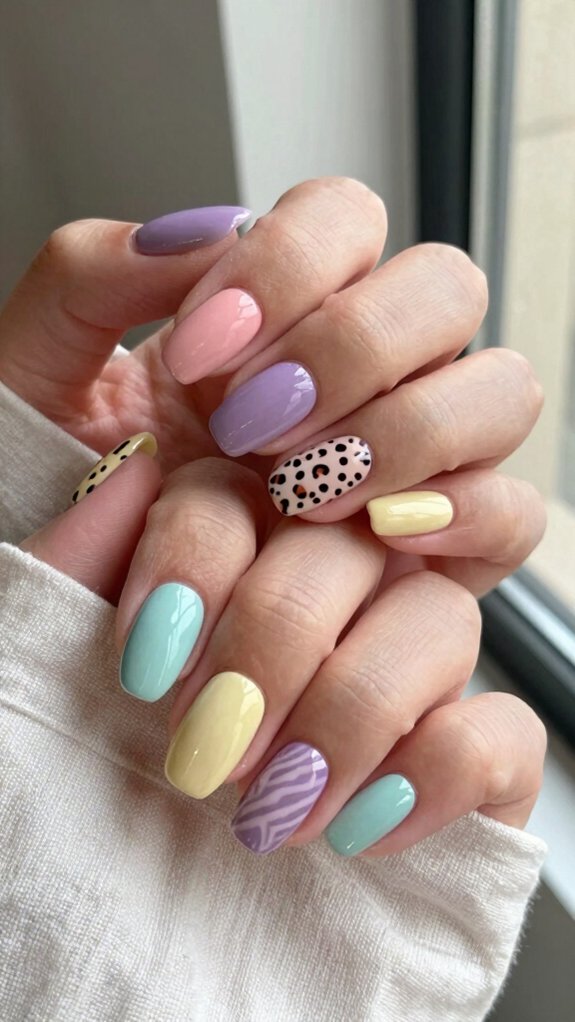
You can totally bring playful energy to your spring manicure by mixing soft animal prints with dreamy pastel shades! Subtle patterns like soft leopard spots or delicate zebra stripes let you rock classic motifs without the bold intensity you’d normally expect.
The best part—you’re not locked into doing your whole hand in print; just accent a couple nails with these gentle designs and keep the rest solid pastels for a look that’s both fun and totally wearable!
Subtle patterns like soft leopard or zebra
If you’re craving something with a little more personality than solid colors, pastel animal prints are where it’s at! You can create ethereal spots and muted stripes that feel fresh and spring-ready without looking too bold. Here’s how to nail the look:
- Use a dotting tool to place irregular pastel blobs in peach, lilac, or pale pink
- Outline loosely with dusty brown or purple instead of harsh black
- Paint muted stripes with white or deeper pastel shades using a fine brush
- Keep animal prints on just one or two accent nails for balance
Finish with glossy topcoat and you’re done!
Soft Pastel Confetti Nails
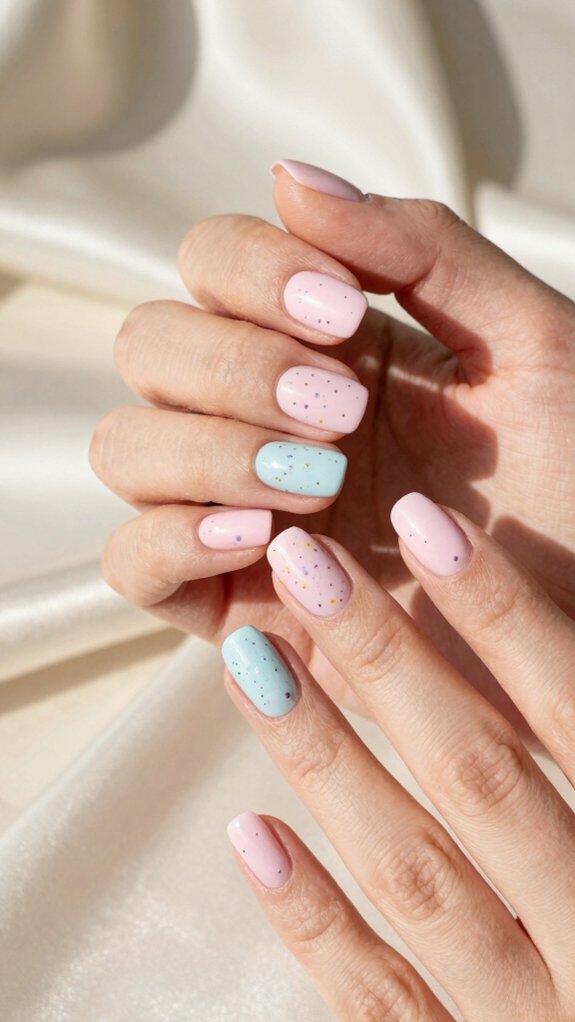
You’re going to love how easy it’s to create soft pastel confetti nails—just sprinkle tiny dots in mint, lavender, butter yellow, and baby pink across a nude or milky base for an instant playful vibe!
The best part? You don’t need to be perfectly precise, since uneven spacing and varied dot sizes actually make the confetti effect look more authentic and forgiving for DIY applications.
Grab a two-sided dotting tool or even a bobby pin, dip it in your pastel shades, and scatter those dots across your nails with zero pressure—this design’s got your back!
Sprinkle tiny pastel dots over base
One of the easiest ways to level up your nail game is by sprinkling tiny pastel dots over a sheer or nude base—and honestly, the imperfect, playful result is exactly what makes this design so charming!
You’ll love how accessible handmade dotting truly is. Grab a bobby pin, toothpick, or dotting tool, dip it into polish, and press gently. The beauty? Your dots don’t need to match!
- Apply a smooth base coat first for flawless results
- Use seasonal color pairing like mint, lavender, and buttercup
- Vary dot sizes and spacing intentionally
- Concentrate dots on accent nails, leaving others solid
Seal everything with glossy topcoat for lasting shine!
Mix-and-Match Pastels
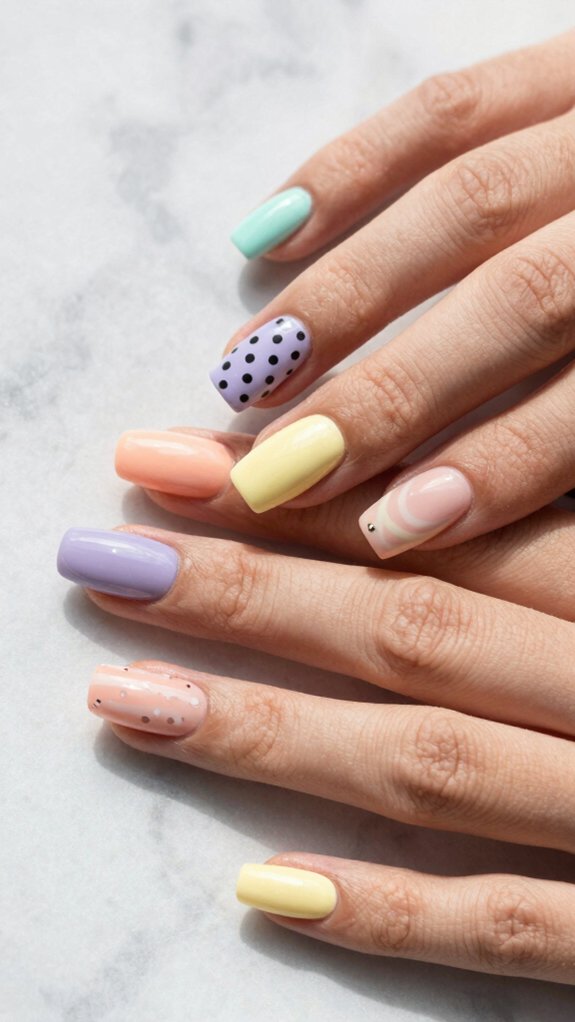
You’re going to love how fun it’s to give each nail its own pastel personality—think buttercup yellow on your thumb, lilac on your index, mint on your middle, baby blue on your ring finger, and bubblegum pink on your pinky!
This “pastel skittles” approach is super easy to pull off and creates an eye-catching look that screams spring and early summer vibes.
The best part? You don’t need any elaborate skills; you literally just paint each nail a different soft shade and you’re done!
Each nail a different pastel color
If you’re craving a manicure that screams playful and fun, mix-and-match pastel nails—often called Pastel Skittles—are totally your vibe!
This trend lets you showcase playful nail swapping by painting each nail a different soft shade. You’ll love the rainbow effect without overwhelming your look!
Here’s what makes it work:
- Pick 4–6 pastel polish swatches in mint, lavender, baby pink, and butter yellow
- Alternate tones across your nails for maximum visual impact
- Use milky variations to prevent streakiness and maintain cohesion
- Add one accent nail with tiny florals or chrome details
Seal everything with glossy topcoat for shine and staying longevity!
Subtle Pastel Glitter Ombre
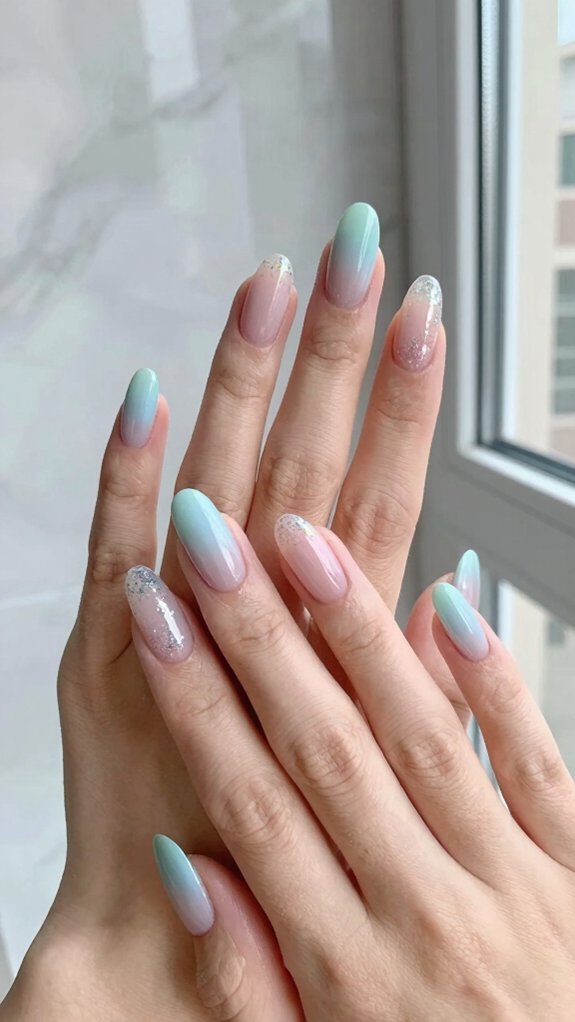
You’re going to love how a glitter fade works its magic—starting bold and sparkly at your tips, then gently softening as it travels toward your cuticles!
By sponging your fine holographic glitter downward and concentrating the pigment at the free edge, you’ll create that dreamy gradient that looks way more polished than chunky.
The key is feathering the glitter so effortlessly that it whispers away rather than stops dead, giving you that salon-worthy ethereal vibe!
Glitter fades from tip to base
By blending glitter from your nail tip toward the base, you’ll create a dreamy ombre effect that’s way more sophisticated than a solid sparkly coat!
This technique uses micro glitter layering to build that seamless fade you’re after.
Start with a milky pastel base like lavender or baby blue, then use a makeup sponge to dab iridescent glitter at your tip.
Work upward in thin passes, lifting toward the iridescent cuticle zone for that effortless blend.
- Apply glitter in light, multiple layers
- Use gel topcoat between layers for durability
- Keep the fade soft and dreamy
- Limit sparkle to one or two accent nails
Frequently Asked Questions
What’s the Hottest Nail Color Right Now?
You’ve got to try soft lavender milk nails—they’re absolutely dominating right now. Their milky, semi-sheer finish is perfect for spring, and you can boost them with pastel gradients or muted neons for that coveted soft-glam look that everyone’s craving this season.
What Are Some Pastel Nail Trends?
You might think pastels look too boring, but they’re actually trendy right now. You can rock soft ombré gradients, muted florals, French tips, chrome accents, and mix-and-match skittles. You’ll fit right in with this season’s most coveted aesthetic.
What Is the Rich Girl Nail Trend?
You’ll love the rich girl nail trend—it’s all about understated luxury. You’re rocking muted pastels with delicate gold details, luxury chrome finishes, and satin accents that whisper sophistication. It’s the quiet elegance that says you’ve got impeccable taste and know what truly matters.
What Nail Polish Colors Look Younger for Older Hands?
Why settle for harsh shades when you’re craving that coveted polished look? You’ll find soft mauve and dusty rose absolutely transformative—these milky pastels soften visible veins while keeping you looking sophisticated and easily chic with the crowd.